Creating & Managing Projects
This guide covers how to create new projects and manage their settings, including teams, assignees, status, and customization options.
Creating a New Project
You can create a project from several locations:
- Projects page: Click the New project button in the header
- Team's projects page: Click Add Project to create a project pre-linked to that team
Create Project Modal
When creating a project, you'll see a modal with the following fields:

Required Fields
- Title: Give your project a clear, descriptive name
- Teams: Select at least one team. Issues in the project will come from these teams.
Optional Fields
- Description: Add context, goals, or any relevant information using the rich text editor
- Status: Defaults to "Planning" - you can change this during or after creation
- Assignees: Add organization members who are responsible for this project
Steps to Create
- Click New project or Add Project
- Enter a project title
- (Optional) Add a description
- Select a status from the dropdown
- Choose one or more teams
- (Optional) Add assignees
- Click Create project
Your project will be created with a unique URL slug based on the title (e.g., q1-product-launch).
Editing Project Details
Title and Description
Both the title and description can be edited directly on the project detail page:
- Navigate to your project
- Click on the title or description area
- Make your changes
- Changes auto-save after you stop typing (1 second delay)
A toast notification confirms when your changes are saved.
Project Sidebar
The right sidebar on the project detail page contains all project settings:

Changing Project Status
To update a project's status:
- Open the project detail page
- In the sidebar, find the Status section
- Click the current status button
- Select a new status from the dropdown
Available statuses:
- Planning (purple) - Project is being planned
- Active (green) - Work is in progress
- On Hold (amber) - Temporarily paused
- Completed (purple) - All work finished
- Archived (gray) - Closed and hidden from default views
Status changes are logged in the project activity.
Managing Assignees
Project assignees are organization members responsible for overseeing the project.
Adding Assignees
- In the sidebar, find the Assignees section
- Click Add assignee or the "+" button
- Search for and select members from the dropdown
- Click to add them
Removing Assignees
- Hover over an assignee in the list
- Click the "×" button that appears
- Confirm removal if prompted
Assignee changes are tracked in the project activity log.
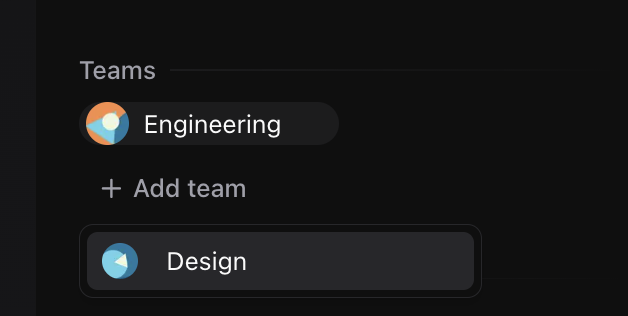
Managing Teams
Projects must have at least one team linked. Teams determine which issues can be part of the project.
Adding Teams
- In the sidebar, find the Teams section
- Click Add team or the "+" button
- Select a team from your organization
- The team is immediately added
Removing Teams
- Hover over a team in the list
- Click the "×" button
Important: You cannot remove the last team from a project. If you need to change the only team:
- A dialog will appear asking you to replace the team
- Select a new team to add
- The old team will be removed and the new one added in a single operation
This safeguard ensures every project always has at least one team.
Customizing the Project Icon
Each project has an auto-generated icon based on its title. You can customize this icon for better visual identification.
Opening the Icon Editor
- On the project detail page, find the project icon in the sidebar
- Click Customize below the icon
Icon Styles
Choose from 5 different icon styles:
| Style | Description |
|---|---|
| Shapes | Geometric patterns and shapes (default) |
| Miniavs | Simple face avatars |
| Adventurer | Character-style avatars |
| Identicon | GitHub-style geometric patterns |
| Rings | Concentric ring patterns |
Customizing the Seed
The "seed" determines which specific icon is generated. By default, it uses the project title.
- Change the seed: Enter any text to get a different icon
- Randomize: Click the dice button to generate a random seed
- Preview: See the icon update in real-time as you type
Saving Changes
Click Save to apply your icon customization. The new icon will appear throughout the app wherever your project is displayed.
Deleting a Project
To delete a project:
- Open the project detail page
- Click the More options menu (three dots) in the header
- Select Delete project
- Confirm the deletion in the dialog
Warning: Deleting a project is permanent and cannot be undone. Issues linked to the project will remain but will no longer be associated with any project.
Project URLs
Projects use human-readable URL slugs based on their title:
https://highfly.app/your-org/projects/q1-product-launch
If you create a project with a title that would create a duplicate slug, a number suffix is automatically added (e.g., q1-product-launch-2).
Next Steps
- Issues in Projects - Learn how to work with issues within projects
- Activity Tracking - Monitor project changes and history