Issues in Projects
Projects provide a unified view of issues across multiple teams. This guide covers how to view, create, and manage issues within a project context.
Viewing Project Issues
From any project, click Board or List in the header navigation to see all issues linked to that project.
Board View
The board view displays issues in a kanban-style layout with columns for each status:
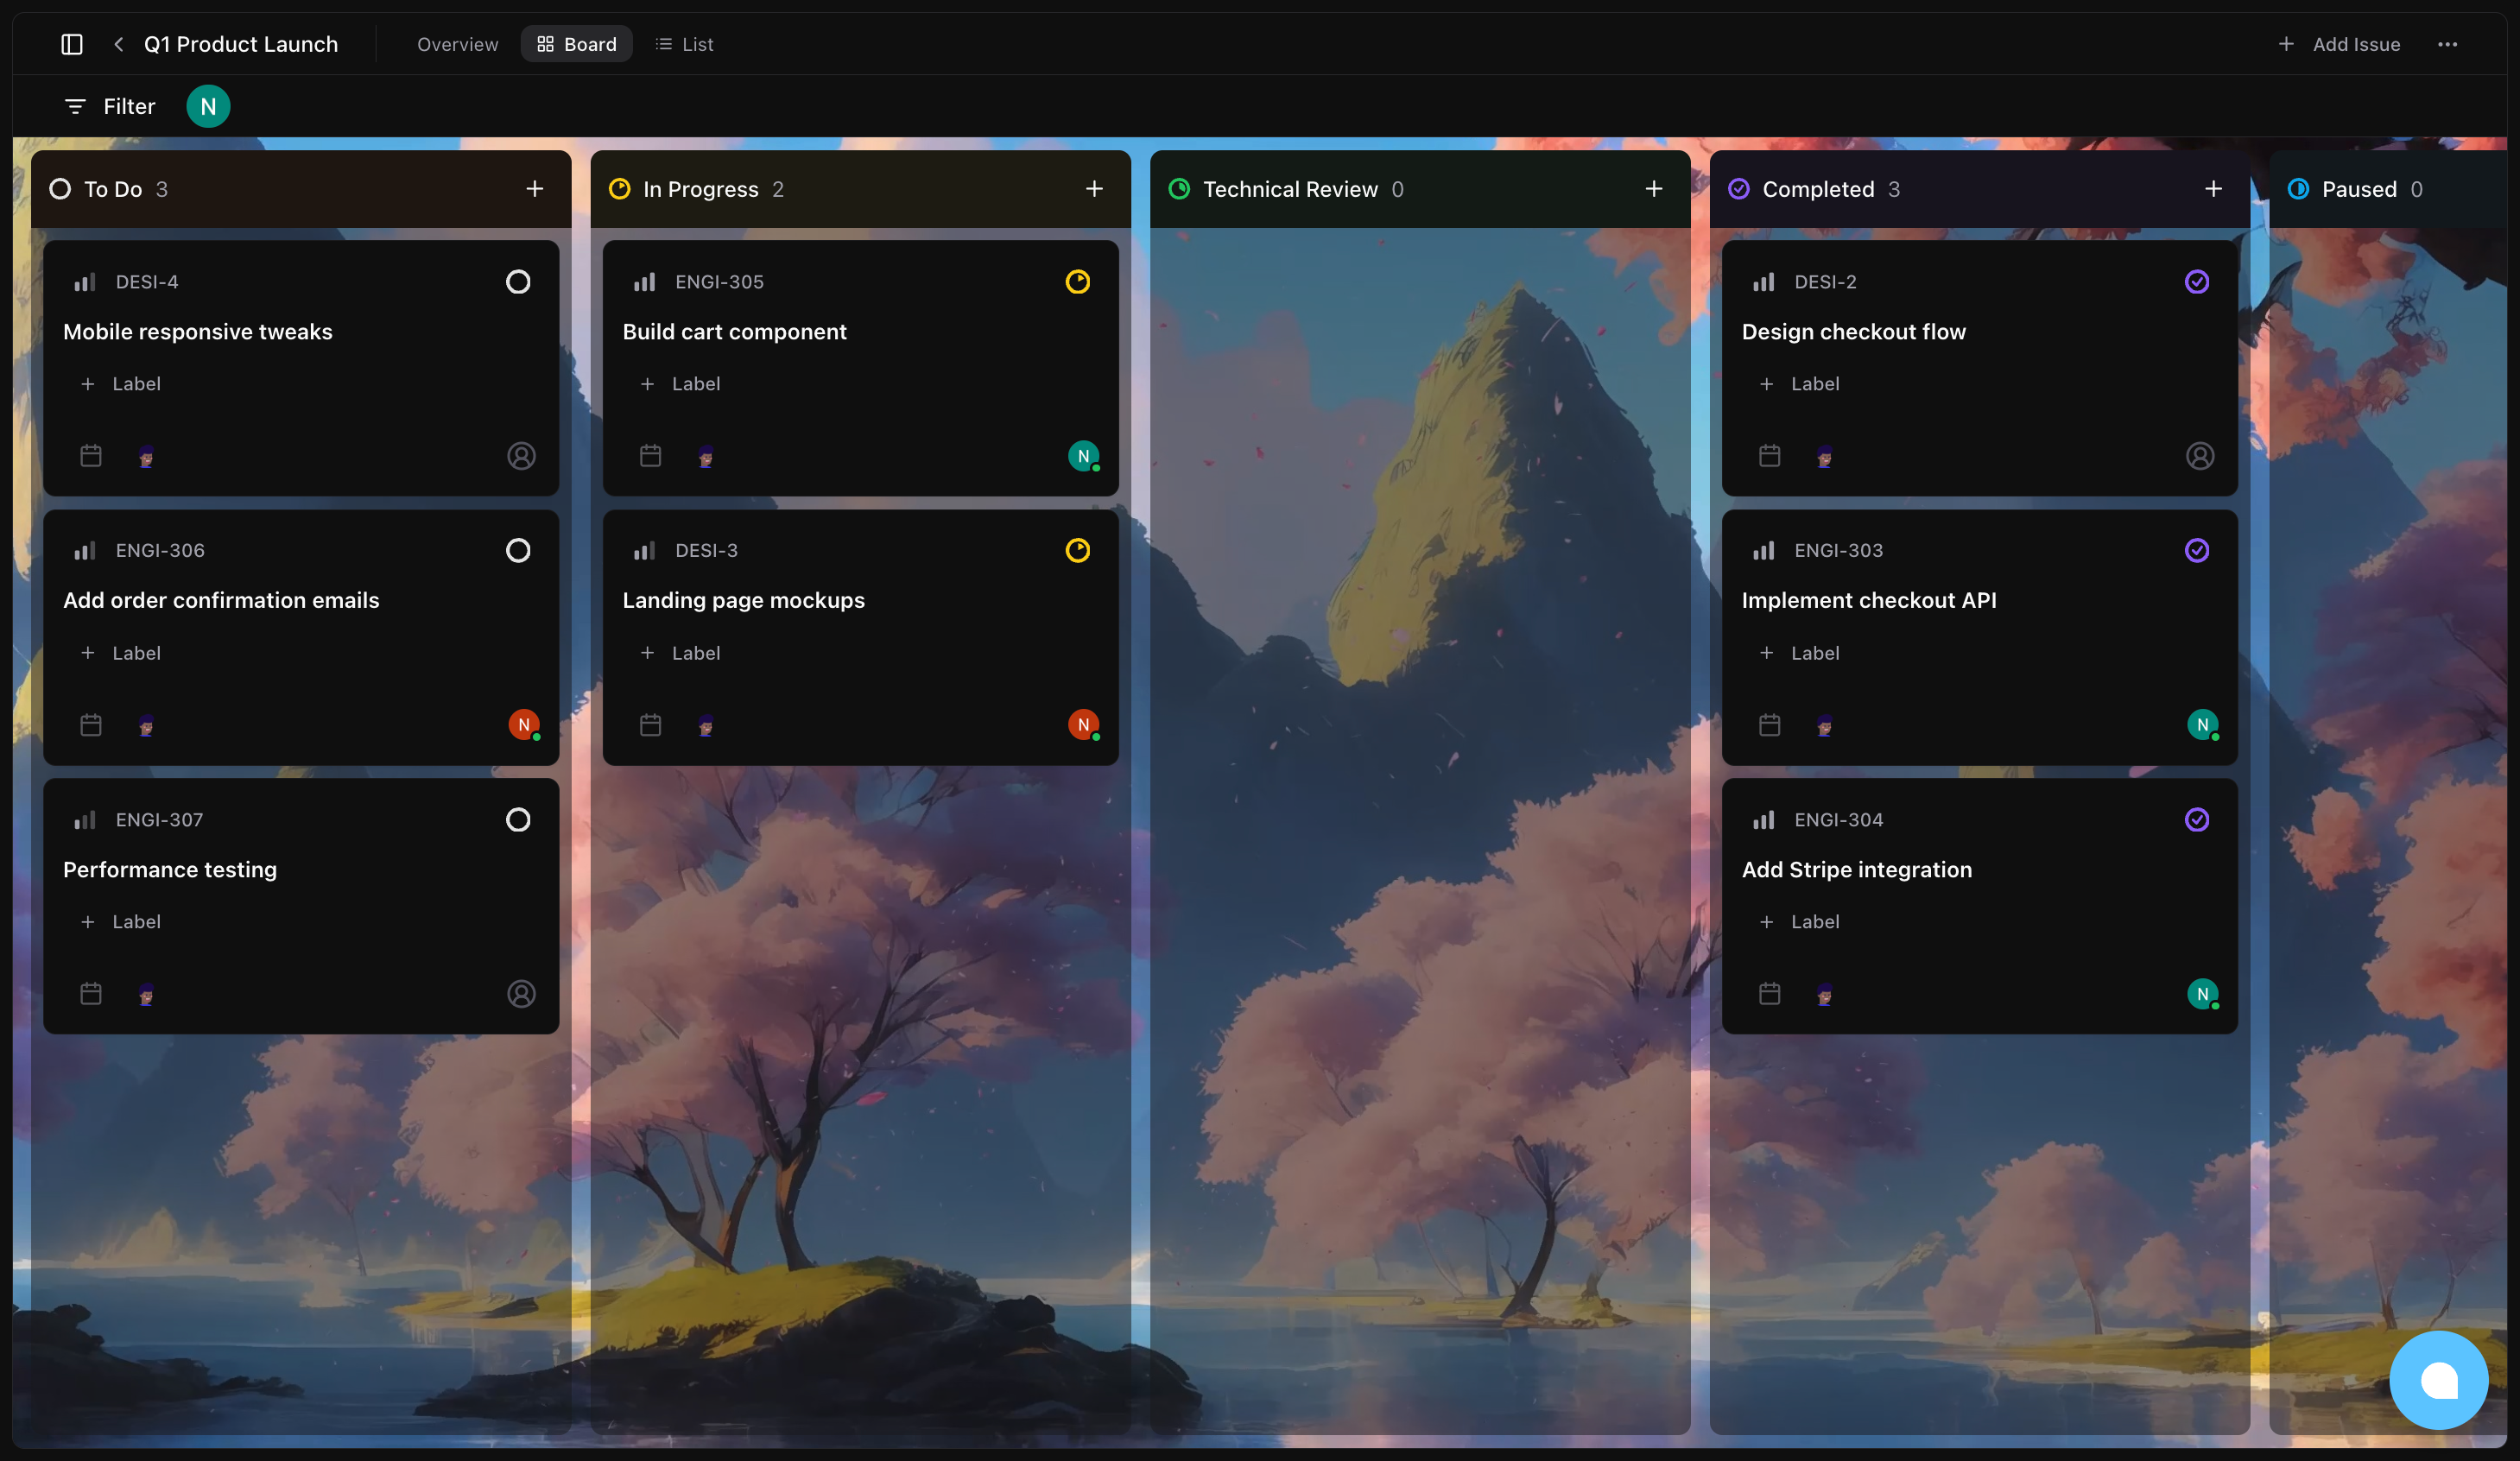
Board features:
- Issues are organized into columns: Backlog, To Do, In Progress, Technical Review, Completed, Paused
- Each column shows the count of issues in that status
- Drag and drop issues between columns to update their status
- Click an issue to open its detail page
- Issues from different teams are visually unified in the same board
List View
The list view shows issues in a compact, grouped format:
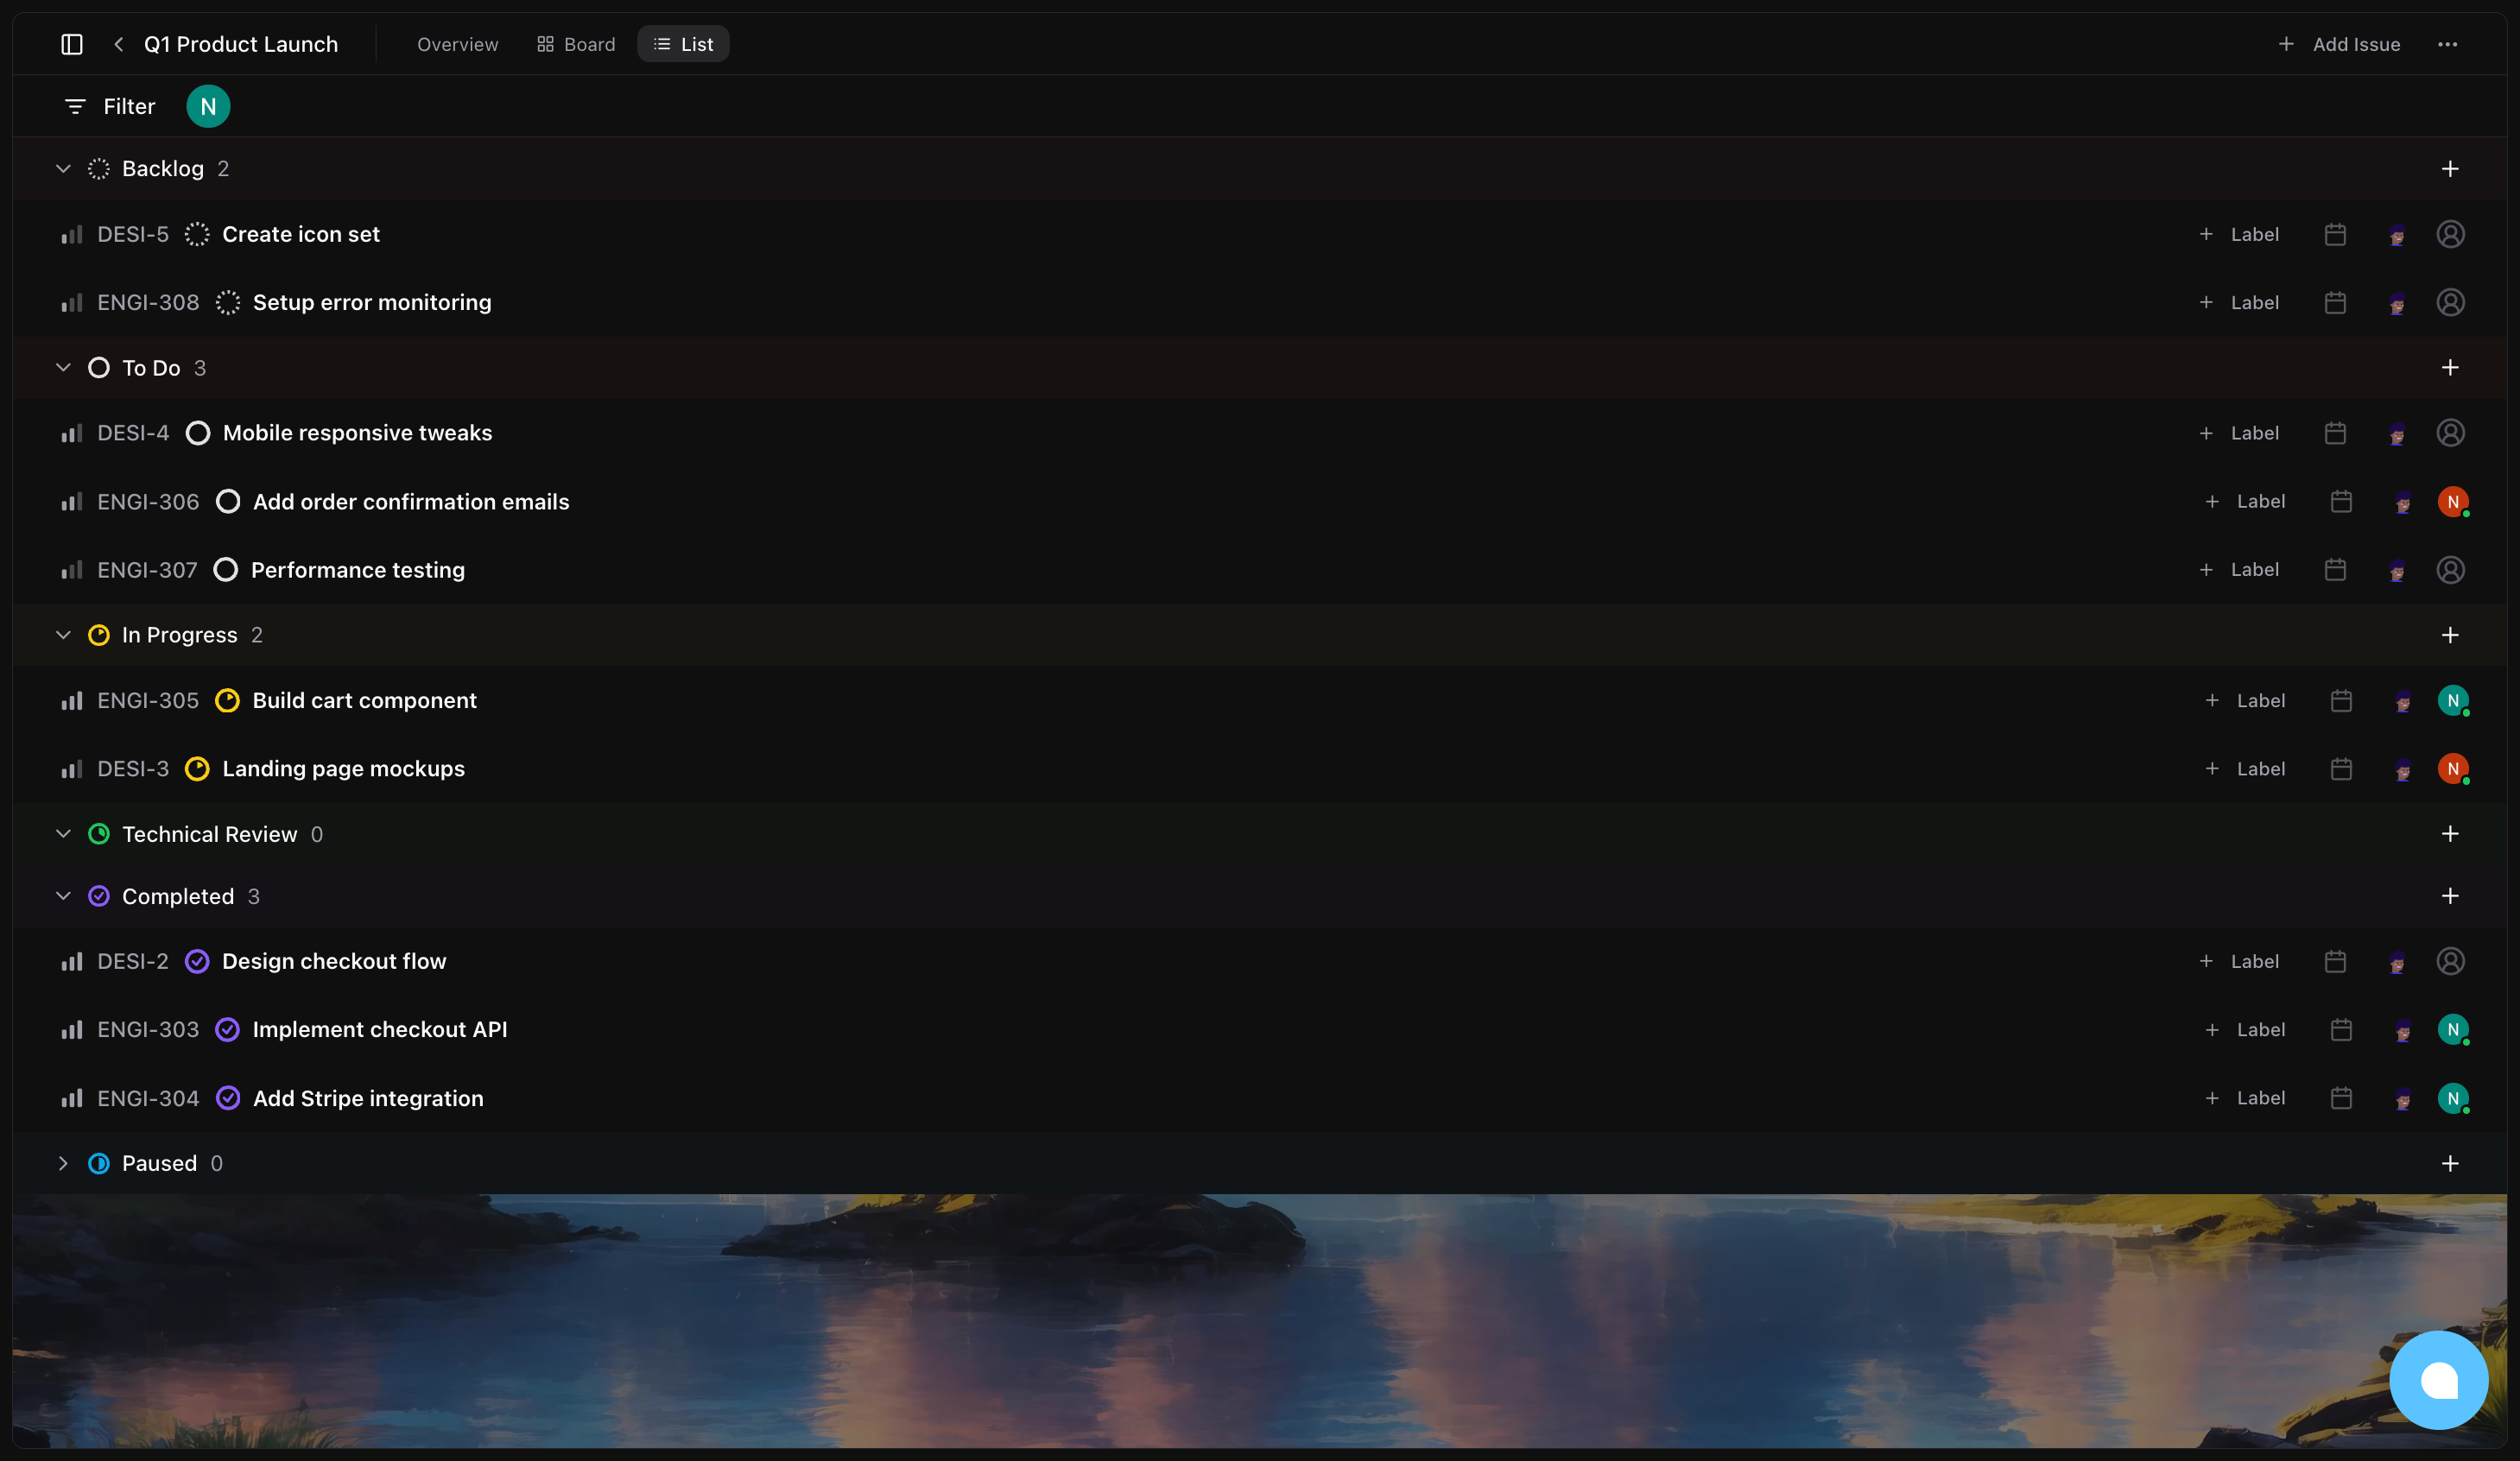
List features:
- Issues are grouped by status with collapsible sections
- Click a status header to expand or collapse that group
- More compact than board view, ideal for projects with many issues
- Same drag-and-drop functionality for status updates
Switching Views
Use the Board and List buttons in the project header to switch between views. Your preference is preserved in the URL:
- Board:
/your-org/projects/project-slug/issues?view=board - List:
/your-org/projects/project-slug/issues?view=list
Creating Issues from Projects
You can create issues directly from a project in several ways:
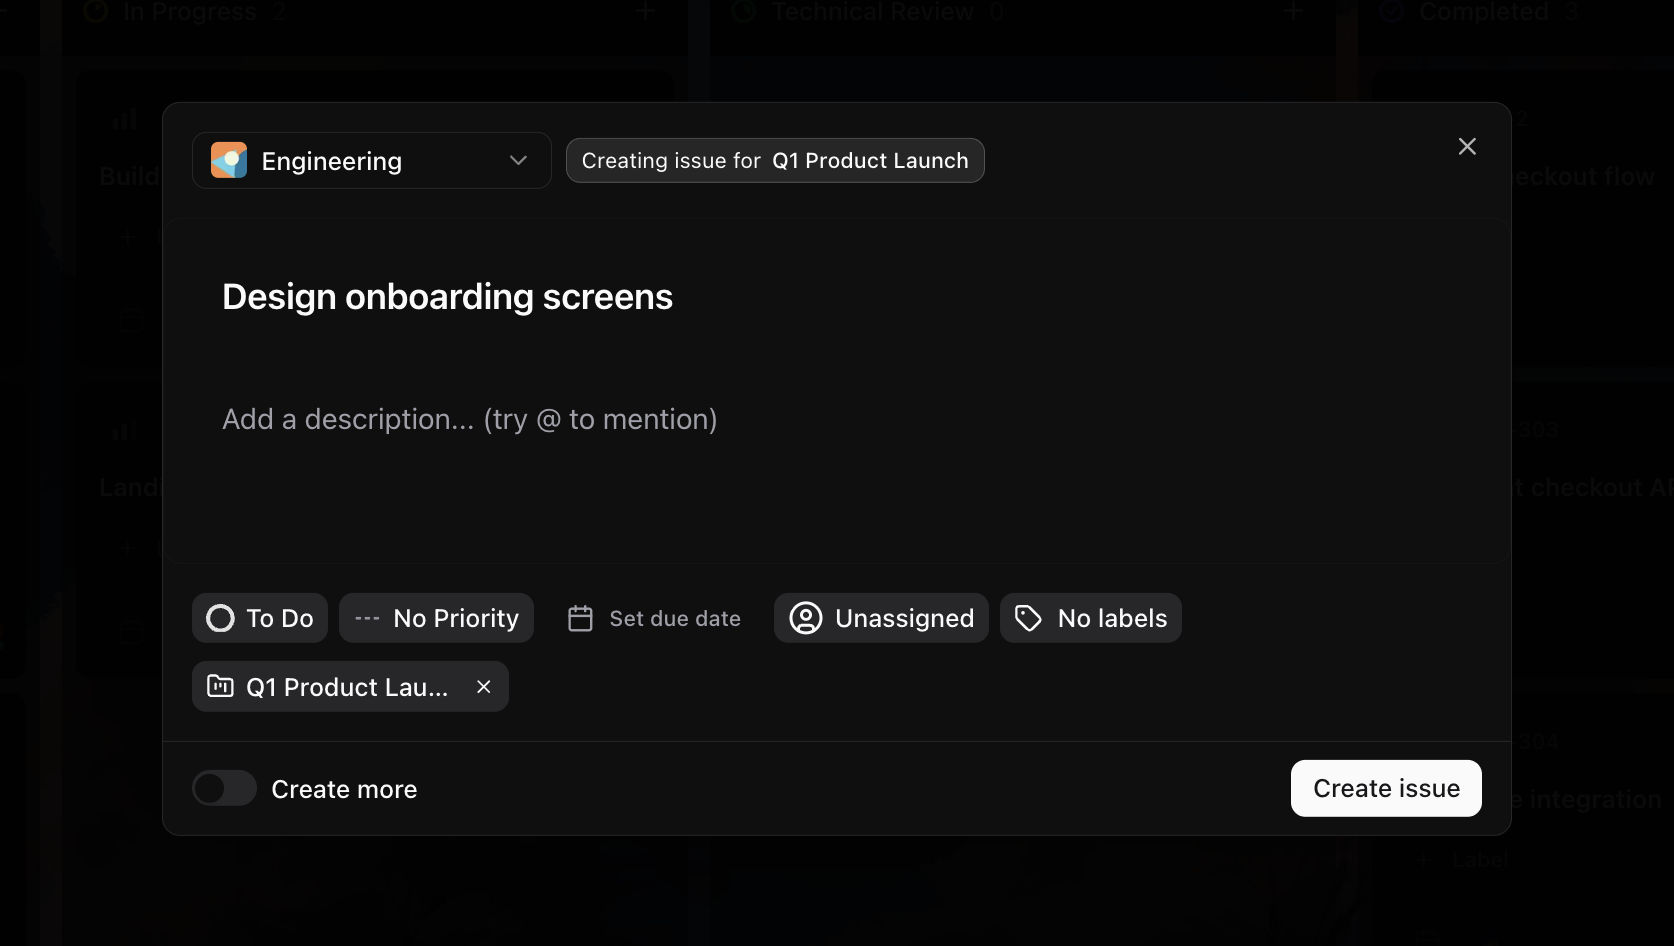
Using the Add Issue Button
- Click Add Issue in the project header
- The create issue modal opens with the project pre-selected
- Choose a team from the project's linked teams
- Fill in issue details
- Click Create issue
The new issue is automatically linked to the project.
Using Status Column Buttons
In board view, each status column has a "+" button:
- Click the "+" button on any status column
- The create issue modal opens with:
- Project pre-selected
- Status set to that column's status
- Complete the issue details
- The issue appears in that column immediately
Using the Sidebar Button
When viewing a project, the sidebar's create issue button also inherits the project context:
- Click the create issue button in the sidebar
- The project is automatically selected
- Create your issue as normal
Linking Existing Issues to Projects
You can add existing issues to a project from the issue detail page:
- Open any issue
- Find the Project field in the issue sidebar
- Click to open the project selector
- Choose a project from the dropdown
- The issue is now linked to that project
To remove an issue from a project, click the project field and select "No Project."
Cross-Team Issue Aggregation
One of the most powerful features of projects is aggregating issues from multiple teams:
Example scenario:
Your "Q1 Product Launch" project includes:
- Engineering team (ENG): Backend and frontend work
- Design team (DES): UI/UX tasks
- Marketing team (MKT): Launch materials
In the project board, you'll see:
ENG-45: Implement checkout flowDES-12: Design landing pageMKT-8: Write launch blog post
All in the same unified view, regardless of team.
Important notes:
- Issues retain their original team identifier (e.g.,
ENG-45) - Changes made in the project view update the issue in its team
- An issue can only belong to one project at a time
Filtering Issues
Use the filter bar in the project header to narrow down visible issues:
Available filters:
- Status: Show only specific statuses
- Priority: Filter by urgency level
- Assignee: Show issues assigned to specific people
- Labels: Filter by team labels
Filters work the same way as they do in team issue views.
Drag-and-Drop Status Updates
Both board and list views support drag-and-drop for updating issue status:
In Board View
- Click and hold an issue card
- Drag it to a different status column
- Release to drop
- The issue status updates immediately
In List View
- Expand the status sections you need
- Drag an issue from one section to another
- The issue moves and its status updates
Visual feedback:
- A drop indicator shows where the issue will land
- The original position is highlighted while dragging
- Optimistic updates mean you see changes instantly
Issue Details in Projects
Clicking any issue in a project opens its full detail page, where you can:
- Edit title and description
- Change status, priority, and assignees
- Add or remove labels
- View and add comments
- See the issue's activity history
- Change which project the issue belongs to
Best Practices
Organizing Issues
- Use consistent labeling across teams for easier filtering
- Set clear priorities to help identify what needs attention
- Keep issue titles descriptive enough to understand at a glance
Managing Large Projects
- Use filters to focus on specific areas
- Collapse completed status sections in list view
- Consider breaking very large projects into phases
Keeping Projects Current
- Regularly update issue statuses as work progresses
- Archive completed projects to keep the projects list clean
- Remove issues from projects when they're no longer relevant
Next Steps
- Activity Tracking - Monitor all changes made to projects and their issues
- Creating & Managing Projects - Learn about project configuration options